Customized Mini ATM APM Auto Blade Fuse Holder Add-a-circuit Fuse Adapter 32V For Japanese Car Truck Motorcycle SUV DIY
Description
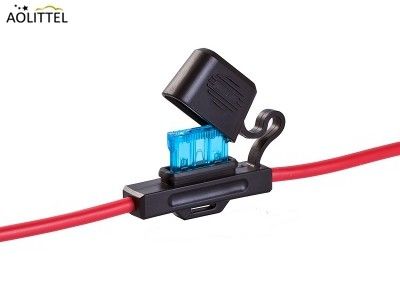
001 Auto Blade Fuse Holder Add-a-circuit Fuse Adapter ,Turn one fuse slot into two whole providing protection for both circuits. This dual slot Add-A-Circuit/Add-A-Line/Fuse Plug provides a fuse slot for the existing OEM circuit and a second slot for a new circuit for a mobile electronic device/accessories

Basic specifications
Insulating Body : Nylon
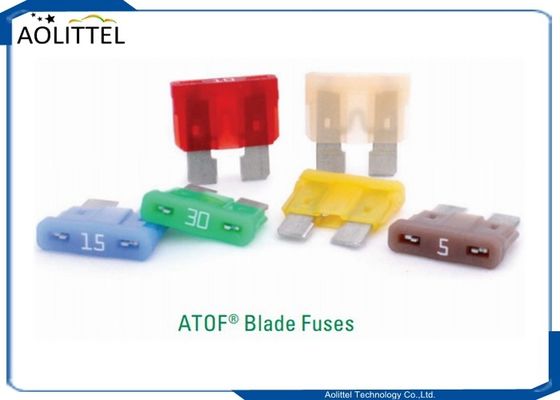
Applicable : For ATM APM 1A~30A
Wire: UL 1015 #16 AWG, Length 127mm, Red
Application : Japanese Car Truck Motorcycle SUV DIY ,as well as other countries,
Main Features
| a. Add-a-circuit low profile mini style blade fuse holder |
| b. Protects original circuit and provides a lead for new circuit |
| c. Turns one fuse slot into two while providing protection for both circuits |
| d. Low Profile allows for extra clearance |
| e. No splicing or wire cutting necessary to install your electronic accessories |
UL Certifications
For safety consideration,technical parameters must be printed on the UL certificated cable.16AWG insulating layer,thermal resistance up to 105C,flame-retardant level up to V W-1.Enought to use in common vehicle refit for connection to high power devices.
Dimension (mm)

Installation Guide


HOW TO ADD A CIRCUIT TO YOUR CAR
Step 1: Materials and Tools


For this project you will only need a few things.
The materials are the following:
an add-a-fuse adapter + a suitable fuse (There are different sizes. Use the size that your fuses have.)
some wire with the right cross-section (see down below)
isolation tape and zip ties
crimp connectors (ring, flat and wire to wire)
a switch that can handle the current your need or a smaller switch + a relay (magnetic switch)
your new device (a phone charger in my case)
And you will also need a basic set of tools including:
a multimeter
a pair of pliers and a wire cutter
a crimping tool
a screwdriver + different bits and nuts
plastic tools
a flashlight
a drill
When you picked everything up go to your car and start working.
Choosing the correct wire size is very important . If the wires are to thin they overheat and can cause a fire. A simple formula to determine the size you need is this one:
( I x L x 0,018 ) / U = A
I : the current that will flow through your cables
L : the total length of the wires in meters ( in this case from the fuse box to your grounding)
U : The maximum Voltage loss you want to have in your wiring ( I recommend 0,5 V)
A : the right cross section in mm^2 (for americans there are tables to find the AWG equivalent)
Step 2: Measuring Your Fuse Slots


The first thing you need to do is locate your fuse box. It can be under the hood or inside your dashboard or both, many modern cars have more than one fuse box. Your owners manual will tell you were it is.
Open it and use your fuse removal tool to remove one fuse at a time. Connect the negative wire of your multimeter to your cars body, set it to 20V DC and measure the voltage of both pins. First measure without the key plugged in.
If a slot's pin shows 12V this means 2 things:
This slot does always have power. You would use such a slot for devices such as an alarm system or our charger that should be able to charge a phone while the car is parked.
It is the input, the other pin is the output and should measure ~ 0V more on that in the next step.
Reinsert the fuse and mark the slot with a post-it or some tape.
If you need a slot that is powered when the key is in position 1 for devices like a radio, you search for a slot that has no power when the key is not inserted, but is powered when it's in position one. Mark it in a different colour if you are connecting more than one device.
If you want a device to only have power in key position two, you follow a similar procedure.
Keep on measuring until you found the right slot for your application.
Step 3: How Does an Add-a-fuse-adapter Work
Step 4: Finding a Way for Your Wires (Corsa C Specific)
Step 5: Pulling the Wires Throug Your Car (slightly Corsa Specific)
Step 6: Crimping the Connectors
Step 7: Connecting Your Device
Step 8: Enjoy the Advanced Functionality

 Your message must be between 20-3,000 characters!
 Please check your E-mail!
  Your message must be between 20-3,000 characters!
 Please check your E-mail!
