2 Way Automotive Car Boat Micro3 Multi Terminal 3Pin Mini Blade Fuse 5A 7.5A 10A 15A 32V For Auto Fuse Tap Holder Block
Description
Micro3 Fuses have 3 terminals and 2 fuse elements with a common centre terminal.
Their sub-miniature design meets the need for more circuits to be protected while utilizing less space.
Micro3 fuses are ideal for high temperatures in adverse environments make Micro3 fuses the recommended choice for protection.

Features
Suitable sizes : 5, 7.5, 10 and 15 Amp.
Voltage Rating: 32 VDC.
Interrupting Ratings: 1000A @ 32 VDC.
Operating Temperature: -40°C to 125°C.
Terminals: Ag Plated Zinc Alloy.
Housing Material: PA66.
RoHS.
Sub-miniature design
New standard for vehicle circuit protection
Space saving - smaller than the MINI® fuse
Size (mm)

Time-Current Characteristic:All ratings
| % of Ampere Rating(A) |
Operating Time |
| MIN |
MAX |
| 110% |
100 hrs. |
- |
| 135% |
0.75 sec. |
120 sec. |
| 160% |
0.25 sec. |
50 sec. |
| 200% |
0.15 sec. |
5 sec. |
| 350% |
0.04 sec. |
0.5 sec. |
| 600% |
0.02 sec. |
0.1 sec. |
Part Numbering
| Ampere Rating(A) |
Part Number |
Housing Colors |
Resistance Value |
Voltage Drop |
| 5A |
1183 |
Tan |
16.9 mΩ |
110 mV |
| 7.5A |
1184 |
Brown |
10.6 mΩ |
104 mV |
| 10A |
1185 |
Red |
7.94 mΩ |
104 mV |
| 15A |
1186 |
Blue |
5.07 mΩ |
97 mV |
Time-Current Characteristic Curve

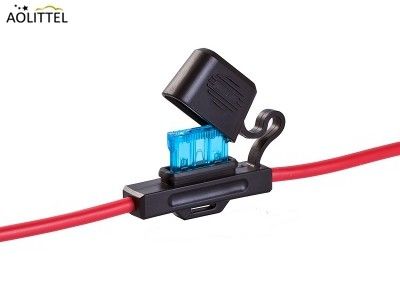
One of Application Example- Add a circuit /Auto Blade Fuse

Description
- Applications: Car LED, Car Black Box, Alarms, Car Remote Starters, Car locators , Engine Block Heaters, DVD Players, Satellite Radio, GPS, Cell Phone Charger...
- Used in new vehicles and limited space. Quick and easy installation of additional 12V accessories without cutting wires.
- Plugs into an existing fuse holder. Protects old circuit and provides a wire lead for the new circuit.
- For use with 3-pin micro blade fuses.
- JUST FUSE HOLDERS, NO FUSE INCLUDED.
Specification
- UL1015 16AWG Wire.
- Length: Approx. 32cm/12.6''
How to change a fuse on a plug socket ?
For a standard plug you will need a screwdriver (usually a flat headed screwdriver but will depend on the screws in that particular plug – take a look at the base).
1) In an anti-clockwise direction, loosen the screw(s) – typically this type of plug will have a larger central screw that holds the cases halves together; that’s the one to go for. You may not need to remove all the screws completely as the back of the plug should come away following a few turns of the screws.
2)Open the case and keep the back and the screw in a safe place for reinstating later.
3)Pull the fuse out, you will find the fuse within two metal holders inside the plug, sometimes these can be tight and need to be prised out, don’t worry if one of the pins lifts out with it initially – this just slides back through the case once the fuse is removed.
4)Replace the old fuse with a new fuse (making sure it’s like for like or that you really understand why it’s changing if it is).
5)It’s often worth just checking the terminals (the small screws that hold the cables in the plug) are tight at this point – a loose connection can cause overheating and an increase in current which may be why the fuse blew initially). Just try to tighten them with (usually) a small flat blade screwdriver to make sure they are nice and tight.
6)Return the lid of the plug and screw firmly. When secure there should be no movement from the metal pins that go into the wall socket.
7)If the fuse blows again, there may be an electrical fault not associated with the fuse. In this instance, we would recommend an electrician to carry out an electrical safety inspection to check the product.


 Your message must be between 20-3,000 characters!
 Please check your E-mail!
  Your message must be between 20-3,000 characters!
 Please check your E-mail!
